Quick Tips for Batch Editing Photos
Have you ever taken dozens of pictures, only to dread the thought of editing each one? you’re not alone! Batch editing is a lifesaver for anyone who loves photography. It allows you to edit multiple images at once, saving you time and effort. Let’s dive into some quick tips that will make your photo editing process smoother and more efficient!
What is Batch Editing?
Batch editing is the process of applying the same edits to multiple photos at once. Imagine you have a family event where you snapped hundreds of pictures. Instead of editing each one individually, you can apply the same adjustments, like brightness and contrast, to all of them in one go. This method not only speeds things up but also keeps your edits consistent.
Why Should You Batch Edit Photos?
Batch editing can free up a lot of your time. Just think about how many hours you could save! According to a report by Statista, professional photographers often spend over 50% of their time editing. By using batch editing, you can cut that down significantly.
What Software Can You Use for Batch Editing?
There are many tools out there to help with batch editing. Here are a few popular options:
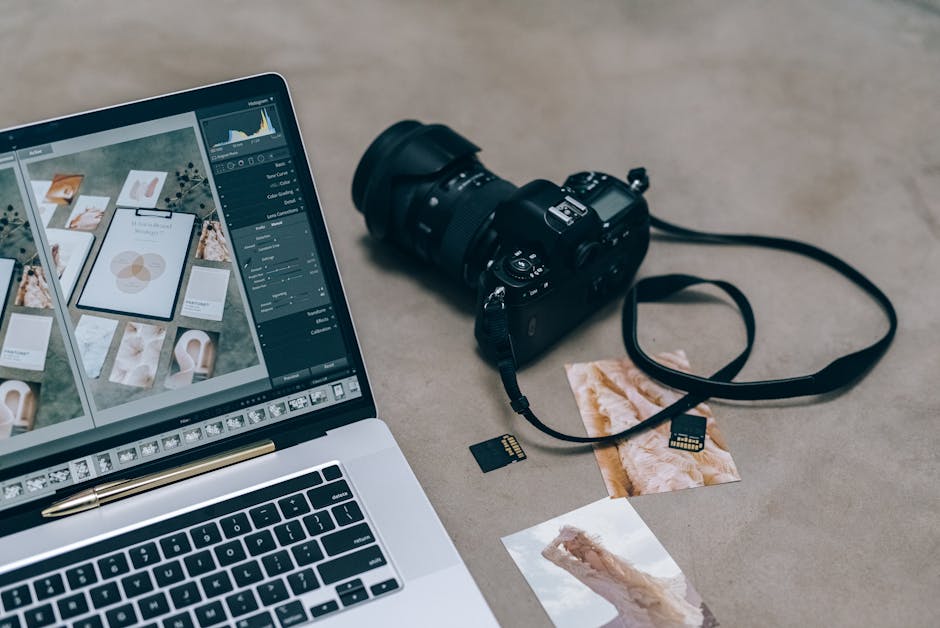
- Adobe Lightroom: A favorite among professionals, it allows easy batch editing with presets.
- Photoshop: You can use actions to apply the same adjustments to multiple files.
- Google Photos: Offers simple batch edits for everyday users.
- GIMP: A free alternative that has batch processing capabilities with plugins.
Choosing the right software depends on your needs and comfort level. If you’re just starting, Google Photos might be the easiest choice.
How Do You Get Started with Batch Editing?
Ready to dive in? Heres a step-by-step guide to get you started with batch editing:
- Step 1: Organize Your Photos. Create a folder for the images you want to edit. This makes it easier to manage.
- Step 2: Choose Your Software. Open your preferred editing tool.
- Step 3: Import Images. Load all the photos you want to edit into the software.
- Step 4: Make Your Edits. Adjust one image to your liking, then apply those changes to the rest.
- Step 5: Export Your Images. Save all edited photos to the desired format and location.
By following these steps, you can streamline your photo editing process like a pro!
What Edits Can You Apply in Batch?
Now, lets talk about some common edits you can make in batch editing. Here are a few to consider:
- Brightness and Contrast: Adjust these to enhance your images.
- Saturation: Boost the colors to make them pop.
- Crop and Resize: Get rid of unwanted parts of the image.
- Sharpening: Make your images crisper and clearer.
These simple adjustments can make a huge difference in the final look of your photos!
Can You Use Presets for Faster Editing?
Absolutely! Presets are pre-made adjustments that you can apply to your images with one click. They save time and ensure consistency across your photos. Many editing programs come with built-in presets. You can also create your own based on your editing style.
For example, if you always like bright and vibrant colors, create a preset that enhances brightness and saturation. Then, just apply it to your batch of photos.
How to Avoid Common Mistakes When Batch Editing?
Even experienced editors can make mistakes. Here are some common pitfalls and how to avoid them:
- Over-editing: it’s easy to get carried away. Keep your edits subtle for a more natural look.
- Ignoring Composition: Always check the composition. Cropping in batch can lead to cut-off subjects.
- Not Reviewing Edits: After batch processing, always review your images. A quick check can save you from unexpected mistakes.
By keeping these tips in mind, youll maintain the quality of your images and avoid frustrating errors.
What About Exporting Your Images?
Once you’re happy with your edits, it’s time to export. Youll want to choose the right format based on how you plan to use the photos:
- JPEG: Best for online sharing due to it’s smaller size.
- PNG: Great for images with transparency or higher quality needs.
- TIFF: Ideal for professional printing, as it maintains quality.
Choose wisely to ensure your photos look their best no matter where you share them!
What are Some Extra Tips for Better Batch Editing?
Here are a few extra tips that can elevate your batch editing game:
- Use Keyboard Shortcuts: Familiarize yourself with shortcuts in your editing software. They speed up your workflow!
- Regular Backups: Always back up your original photos before editing. You never know when you might want the originals.
- Stay Organized: Keep your files organized. Use folders for different events or themes.
These tips can save you time and headaches in the editing process.
How Can You Keep Learning?
Batch editing can seem overwhelming at first, but practice makes perfect. Consider joining online forums or groups where you can share tips and learn from others. Websites like PhotographyTalk offer great resources and community support.
Also, don’t hesitate to explore tutorials specific to your editing software. Many platforms, like YouTube, offer free step-by-step guides that can help you master batch editing in no time.
Conclusion: Get Started Today!
Batch editing photos can significantly reduce your editing time and improve your workflow. Remember to choose the right software, make smart edits, and use presets to speed up your process. Keep practicing, and soon, youll be editing like a pro!
Now, grab your photos, and start batch editing today! The more you practice, the more efficient you will become. Happy editing!