The Best Camera Settings for Every Situation
Have you ever captured the perfect moment only to find that your photo didnt turn out as expected? you’re not alone! Many photographers struggle with camera settings. But don’t worry; we’re here to help you master the best camera settings for every situation.
From bright sunny days to dimly lit evenings, understanding your camera’s settings can make a huge difference. Lets dive into the key settings you need to know.
What are the Basics of Camera Settings?

Before we get into specific situations, lets cover some basics. Your camera has three main settings that control exposure: aperture, shutter speed, and ISO. Together, they help you capture the right amount of light.
- Aperture: This controls how much light enters your camera. A lower number (like f/2.8) means a wider opening, letting in more light. This is great for portraits.
- Shutter Speed: This is the amount of time your cameras shutter is open. Faster speeds (like 1/1000 sec) freeze motion, while slower speeds (like 1/10 sec) can create a blur.
- ISO: This measures your camera’s sensitivity to light. A low ISO (like 100) is great in bright conditions, while a high ISO (like 3200) helps in darker settings.
Understanding these basics will help you adjust to different settings as needed. Now, lets talk about specific situations.
What Settings Should I Use for Bright Daylight?

When shooting in bright sunlight, you want to avoid overexposing your images. Here are the settings to use:
- Aperture: Start with a mid-range aperture, like f/8 or f/11. This gives you a sharp image with a good depth of field.
- Shutter Speed: Use a fast shutter speed, such as 1/500 sec or faster. This helps freeze any movement and reduces the risk of overexposure.
- ISO: Keep your ISO low, around 100 or 200. This will provide the cleanest images.
Tip: Consider using a polarizing filter. It reduces glare and can make the skies pop!
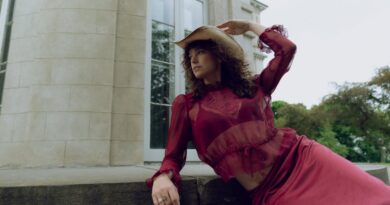
How Do I Capture Stunning Portraits?

Taking portraits can be rewarding, but it also requires specific settings to make your subject shine. Heres what to focus on:
- Aperture: Use a wide aperture, like f/2.8 or f/4. This blurs the background and highlights your subject.
- Shutter Speed: Keep your shutter speed at least 1/100 sec to avoid motion blur. If your subject is moving, go faster.
- ISO: Start with an ISO around 100-400 if you’re in good light. Increase it if the light is dim.
Remember to communicate with your subject. It helps them relax and look natural in the photo.
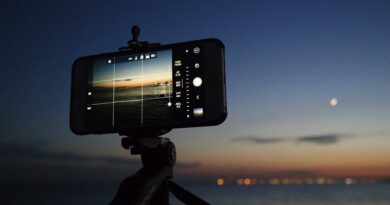
What Are the Best Settings for Night Photography?

Night photography can be magical, but it requires a different approach. Heres how to set up your camera:
- Aperture: Use a wide aperture, like f/2.8 or lower, to allow as much light in as possible.
- Shutter Speed: Slow down your shutter speed1 second or longer is common for night shots. Use a tripod to keep your camera steady!
- ISO: Increase your ISO to around 800 to 3200. This helps capture details in low light.
Fun Fact: Long exposures can create stunning light trails from cars or stars!
How Can I Shoot Action or Sports?
Capturing action shots can be tricky, but the right settings make it easier. Heres what to do:
- Aperture: Use a mid-range aperture, like f/5.6 or f/8. This gives you enough depth of field to keep moving subjects in focus.
- Shutter Speed: Aim for a fast shutter speed, such as 1/500 sec or faster, to freeze the action.
- ISO: Depending on the light, set your ISO between 400 to 1600 to keep the image bright and clear.
Pro Tip: Use continuous shooting mode to snap multiple frames in quick succession. This increases your chances of getting the perfect shot!
What Are the Ideal Settings for Landscape Photography?
Landscapes can be breathtaking, and capturing them well requires attention to detail. Use these settings:
- Aperture: Opt for a small aperture, like f/11 or f/16. This keeps more of the scene in focus.
- Shutter Speed: Use a slower shutter speed, especially if you want to capture movement in water. A tripod is essential here.
- ISO: Keep your ISO low, around 100-200, to minimize noise and maintain sharpness.
Remember: The golden hour, just after sunrise or before sunset, provides the best natural light!
How Do I Shoot in Low Light or Indoor Settings?
Indoor lighting can be challenging, but there are ways to get great shots. Heres how to adjust your settings:
- Aperture: Use a wide aperture, like f/2.8, to let in more light.
- Shutter Speed: Slow your shutter speed to around 1/60 sec. Be careful to hold your camera steady!
- ISO: Raise your ISO to 800 or higher to help capture details in dim light.
Tip: If you have a flash, use it wisely. A harsh flash can wash out your subjects!
What Are the Best Settings for Macro Photography?
Macro photography allows you to capture small details, but it requires precision. Heres what to keep in mind:
- Aperture: Use a narrow aperture, like f/16 to f/22, for more depth of field.
- Shutter Speed: Use a faster shutter speed, around 1/200 sec, to avoid motion blur.
- ISO: Keep your ISO low, around 100-400, to maintain clarity.
Fun Tip: Use natural light to your advantage! Position your subject near a window or outdoors for the best results.
How Can I Make My Photos More Creative?
Now that you know the settings for various situations, let’s talk about creativity. don’t be afraid to experiment! Here are some ideas:
- Try different angles. Get low or shoot from above.
- Play with light. Use shadows or reflections to add interest.
- Adjust your settings. don’t be afraid to change them for a new effect.
Remember, photography is an art. Your personal touch makes your images unique!
Final Takeaways
Mastering camera settings takes practice, but it’s worth it for stunning photos. Start with the basics: aperture, shutter speed, and ISO. Adjust them according to the situation you’re in, whether it’s bright daylight, low light, or capturing action.
Remember these key points:
- Bright daylight: f/8, 1/500 sec, ISO 100
- Portraits: f/2.8, 1/100 sec, ISO 100-400
- Night photography: f/2.8, 1 sec, ISO 800-3200
- Action: f/5.6, 1/500 sec, ISO 400-1600
- Landscapes: f/11, slower shutter, ISO 100-200
- Low light: f/2.8, 1/60 sec, ISO 800+
- Macro: f/16, 1/200 sec, ISO 100-400
With these tips, youll be ready to tackle any photography situation. So grab your camera and start shooting! For more in-depth photography tips, check out Digital Photography School.
Happy shooting!